Papa's Dresser is Finally Mine!


This past summer was one of the best summers I've had in a long time. I always enjoy summer, but this one was packed full of all my favorite things, and I'm confident I didn't waste a minute of it. My days were spent enjoying family, weaving, sleeping, reading, photographing, playing and traveling (I have pictures of my trip to NYC to share with you soon). I grew some food, caught (and missed) a plane by myself for the first time, and acquired some fabulous new furniture.

And now, four months after my summer vacation ended, I've finally managed to clean my bedroom enough to photograph that fabulous new furniture. (Bad house blogger...)

Feast your eyes on my new treasure up there.  Isn't it beautiful? This furniture is great just because its shape and style, but it is extra neat-o because it belonged to one of my favorite people ever.


When my grandma passed away in 2009, all the furniture in her home was given out to the kids who needed it. My college-aged little sister needed a bedroom set, so Papa's set went to her. I really wanted it, but I already had a bedroom set that had belonged to Rand's grandpa, and he didn't want to part with it. So basically, I was stuck with a set I didn't like.

I painted it and added DIY leather knobs, you know the story. Even though I like how that other set turned out, it still doesn't measure up to Papa's furniture, so when my sister decided to upgrade to other stuff in her home, I snagged it.  Our old set has moved on.

Unfortunately, Papa's set showed signs of living in a college student's apartment. It needed a little love.

I really didn't want to sand down and restain this set. The odds that I would get the stain to match perfectly were slim, and also, I just don't like it. I prefer the original, even if it's imperfect. In order to revive, but not redo this furniture set, I dug around for Morgan Satterfield's great post on refreshing old wood furniture.

Side note: Does anyone know what happened to Morgan? She's disappeared from everything, even her online store. I don't know her personally and it's none of my business, but I miss her.

Anyway, I followed Morgan's directions to the letter. I also switched out the itty-bitty knobs for some bigger, louder ones. Two original knobs were missing and the drawer pull from the middle drawer was gone, so I just replaced all those places with my new knobs. I like how it looks cohesive and a little quirky now.

Rand likes all the drawer space. I like the mid-century shape and beautiful wood. And that it was Papa's. And free. Win/win on this one.


Speedy Sarah's Homemade Granola


Lately, my horrible eating habits have been on my mind. I wake up with a headache nearly every day (which is cured by coffee every morning, but still) and I have too little energy. My friends have suggested some vitamins that might help, but before I begin self-diagnosing a vitamin deficiency, I feel like I should tackle an obvious issue in my life: I eat crap.

We're talking fast food nearly every night. Grocery store junk food with lots of hydrogenated (not sure what that means) mystery ingredients. Even when I cook at home, it's pretty pitiful. I've let this part of my life slip pretty badly, and now the thought of cooking healthy, real food has started to feel overwhelming. Where do I start? Won't this be crazy expensive? Thinking about it makes me want to take a nap.

If you follow me on Instagram (and I hope you do), you may have seen me mention my friend Sarah. I often lovingly refer to her as Speedy Sarah, since she is a talented, fast runner with drive that inspires me every Saturday morning. My goal for every run is just to keep up with her. Not only does she work hard to stay fast and fit, but she also teaches full time and is a mother of two kids. And during our runs, she tells me about what's new in her life, and I can't help but think, "How are you awake right now?!"

Not only that, but Sarah feeds her family really good food. She's got me wondering if this is the root of my problem. And I figure, even if it's not, eating natural, healthy food seems like a good idea anyway. But how do you go from eating total junk to eating right? I'm not talking about just picking up an apple. My issue is, I like to eat. If this is going to work, I need some tasty food that I'll actually stick with. It needs to be easy, delicious, and not cost too much. I hope I'm not being unreasonable.

So Sarah gave me a starting point. Let's begin by learning to make just one thing, and let's make it a yummy snack, mkay? Here we go.

Speedy Sarah's Homemade Granola

Ingredients:
  • 1/2 cup organic coconut oil
  • 1/2 cup honey
  • 3 cups rolled oats
  • dried fruit (optional)
  1. Preheat the oven to 300 degrees. Spread the 3 cups of rolled oats over a baking sheet and bake for 15 minutes, stirring occasionally. 
  2. Meanwhile, melt your coconut oil in the microwave and pour 1/2 cup coconut oil and 1/2 cup honey into a mixing bowl. Smart person tip: measure out the oil first, so the honey will slide easily from your measuring cup. Mix it all up and grease a baking pan. I used coconut oil for that, too.
  3. When your oats are browned, pour them into the bowl with the oil and honey. Mix well.
  4. Spread the mixture into the greased baking pan. Bake for 20 minutes. 
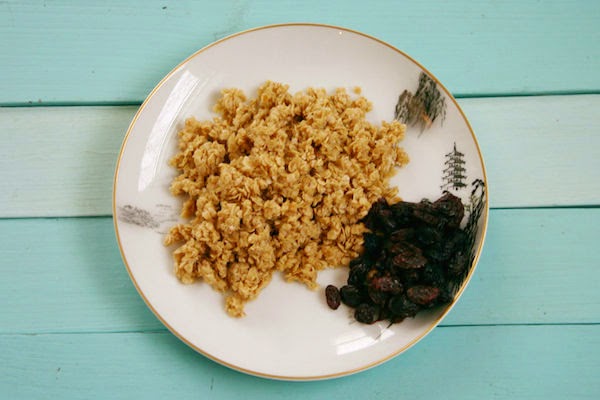
  5. Take your granola out of the oven and let it cool. When you think it's cooled enough, plop some on a plate. You can mix in some dried fruit at this point, if you like. Eat and enjoy! Put the leftovers in a sealed container.
So easy! As a very lazy cook, I give this recipe my stamp of approval. It was simple to make (even I didn't screw it up) and now I have leftovers for anytime I need a snack. Another bonus: Rand liked it. We have a winner!

One recipe down. Now I'm on a mission to learn to make another easy something. Another snack maybe?


Dining Room Shelfies

I put up some shelves on the wall in my dining room, and it only cost me $1.

*Results not typical.

What do you think? Not sure why the bottom of this photo looks so weird.


Hmm. I don't feel like this photo reflects it, but those shelves ARE level. I checked.

How were they $1 you ask? I found those white IKEA brackets at a garage sale for a dollar, and I used scrap wood from our garage (actually old original trim pieces) for the shelves. The shelves aren't as deep as I would like, but that can be adjusted later. I was determined to use materials I already had on hand for this project to keep things as cheap as possible.


I added my gold trunk underneath and it fit perfectly. The best part about this project was getting to style up the shelves afterwards. They're still not quite right, but close. Having good shelf space for all my cute crap is da best.


I drilled into studs in the wall to hang these shelves, so I know they're not going anywhere. I still cringe a little every time I set something on them, though. I do that every time I sit in my hanging chair, too. It's still just a little scary, but seems to be holding up. For now.


Ahh, it feels so good to get this done and get some things up off the floor. They're still looking a little bare, but I plan to hang some small frames in those empty spaces and gradually add more plants as I get a little braver. These shelves add more cat-safe real estate where my plants are safe from being gnawed down to nubs. In fact, I think I want to buy two more of those brackets and put some matching shelves on the other side.


I call that a pretty productive weekend.

TRJ trivia question: How many DIYs can you spot in the picture above? :)
Related Posts Plugin for WordPress, Blogger...